How do I assign mail to a Mailbox Account (PMB)?
What Device are you using?

Web Page
1.) Part One - Locating and Selecting the mail item
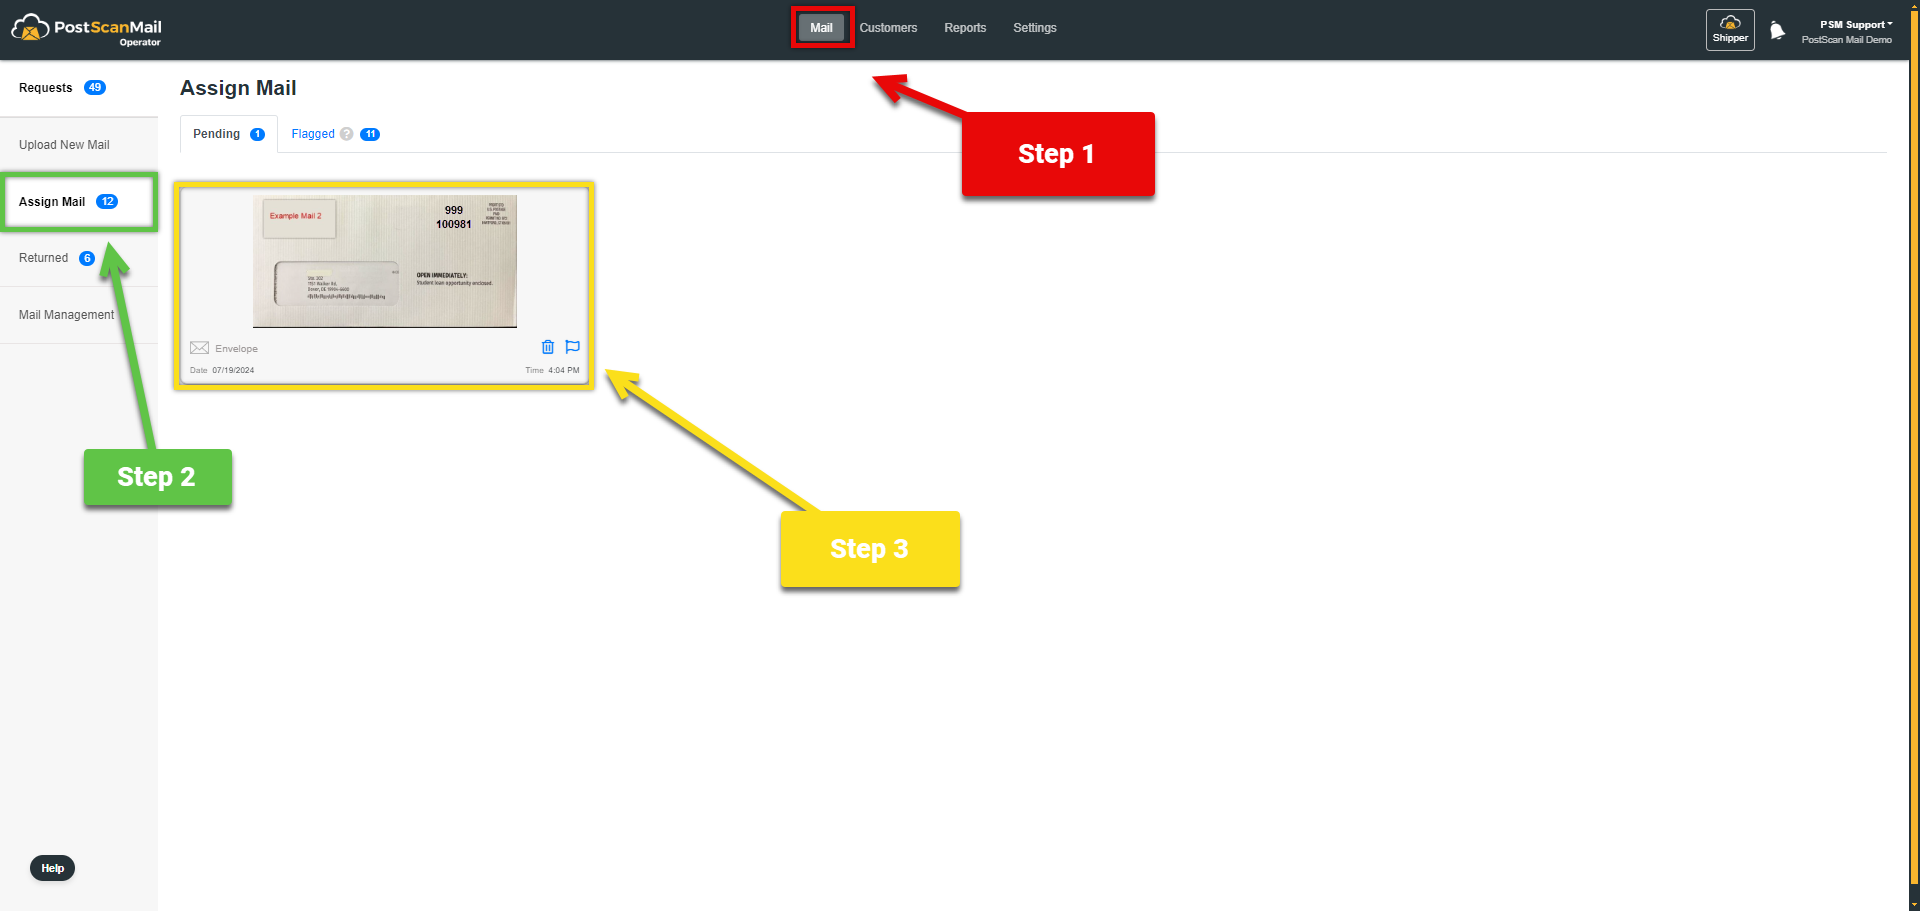
1.) Select the Mail tab at the top of the screen, highlighted in RED.
2.) Select the Assign Mail button in the menu to the left of the screen, highlighted in GREEN.
3.) Click on the piece of Mail that is being assigned, highlighted in YELLOW.
2.) Part Two - Locating the Mailbox and assigning the mail
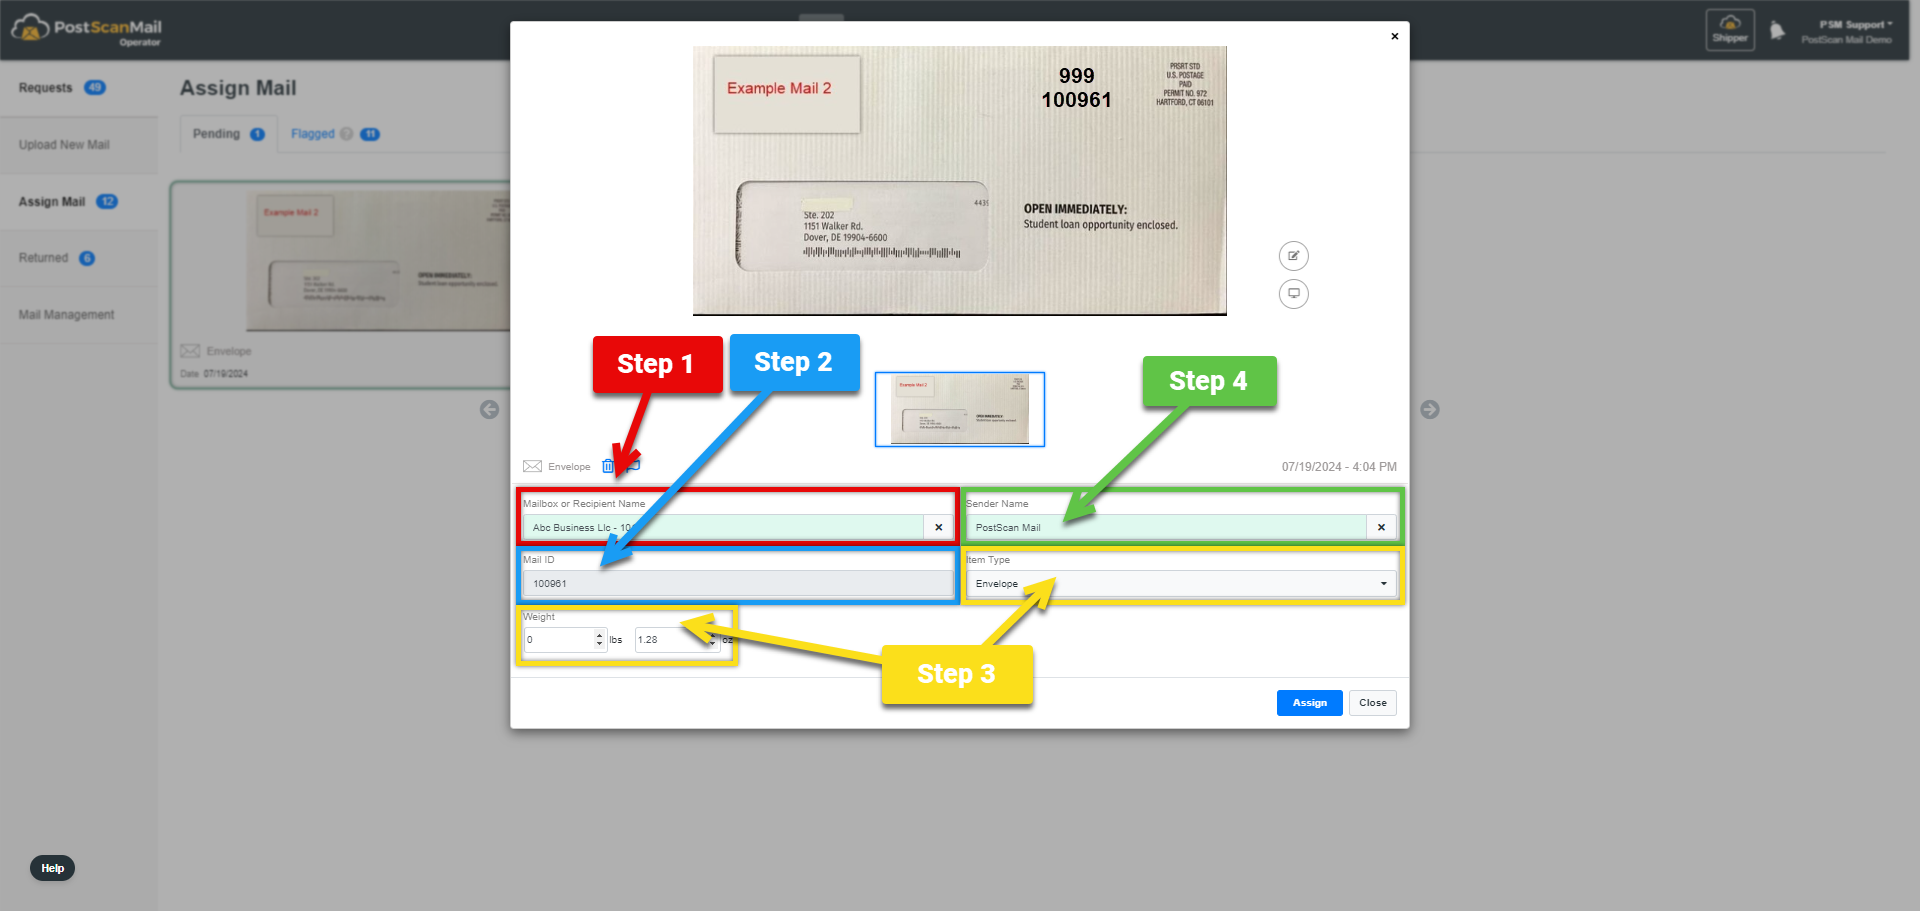
1.) Enter The Mailbox or Recipient Name into the search field, highlighted in RED.
2.) This is where the Mail ID# Is displayed, highlighted in BLUE.
3.) The section to the left highlighted in YELLOW, is where the weight is entered. The section highlighted in YELLOW to the right is where the Mail Type is selected.
It is VERY IMPORTANT that this is correct. If you have any questions on the different Mail Types - Click Here
4.) The section highlighted in GREEN. Is where the sender is entered. To change the sender, click the Sender button.
Once selected a drop menu will appear. If the customer has a previous sender it can be selected, if there is no previous sender a new one can be typed in.

3.) Part Three - Labeling the mail item.
Now the mail can be labeled with the PMB# and the Mail ID#

Note: This example is the recommended way to label mail.
1.) The PMB# is the top number, highlighted in RED.
2.) The Mail ID# number is the bottom BLUE.
iOS Application

Android Application
1.) Part One - Select the Navigation Menu, highlighted in RED

2.) Part Two - Choosing the filter for mail that needs assigning

1.) Select the Assign Mail button in the menu, highlighted in RED. This will bring a drop down with two selections.
2.) The first selection is All Mails. This will bring up any mail that has been scanned and uploaded and still needs to be assigned. Note: This can be from other operators as well.
3.) The second selection is New Mails. This will bring up any mail that has been scanned and uploaded by the device that is being used.
3.) Part Three - Selecting the mail items that need assigning

1.) In the box highlighted in RED, is a list of mail currently needing to be assigned.
2.) The check marks highlighted in GREEN are used to select each piece of mail. Note: All of the mail selected will be assigned to the SAME PMB#.
3.) The first button highlighted in YELLOW is Assign Later. This will put the mail back into the Assign Mail menu. The Next button will bring up the search to assign the mail to a PMB#.
4.) The + New Item button highlighted in BLUE, allows you to return to the image capture screen and continue uploading new mail.
4.) Part Four - Selecting the mailbox (PMB) to assign the mail to

1.) In the Search Field, highlighted in RED, enter the customers PMB#.
2.) If you do not know the PMB# and need to search by Name or Business, select the Name tab, highlighted in GREEN.
3.) Now select the Customer tab, highlighted in BLUE.
5.) Part Five - Confirmation Screen

1.) A confirmation screen will appear. Make sure that all of the selected items are correct and being assigned to the correct PMB#. Click the Assign button, highlighted in RED when finished. This will send an automatic notification to the customer that they have new mail.
6.) Part Six - Labeling the mail item
Now the mail can be labeled with the PMB# and the Mail ID#.
Note: This example is the recommended way to label mail.
1.) The PMB# is the top number, highlighted in RED.
2.) The Mail ID# number is the bottom BLUE.