How do I process a shred request?
What Device are you using?

Web Page
1) Navigating and selecting the mail item.

1.) Select the Mail tab at the top of the screen, highlighted in RED.
2.) Select the Requests button, in the menu to the top left of the screen, highlighted in GREEN.
3.) Select the Shred button, highlighted in BLUE.
4.) Select the checkbox of all the mail items that are being shredded, this is found in the top left corner of the mail item, highlighted in YELLOW.
5.) When all the mail items that are being shredded have been selected. Click the Shred button towards the right of the screen. This is highlighted in GREEN and labeled STEP 5.

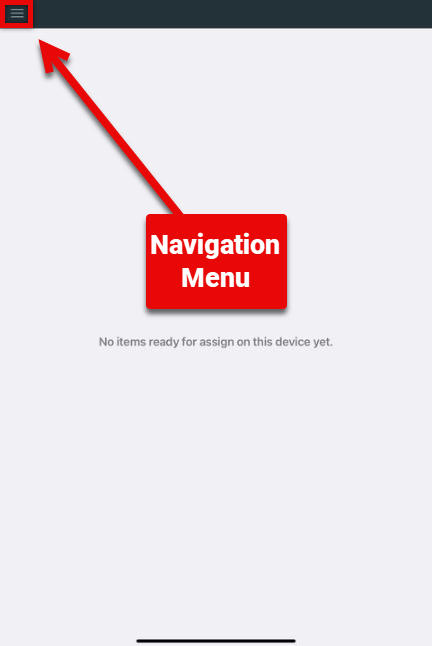
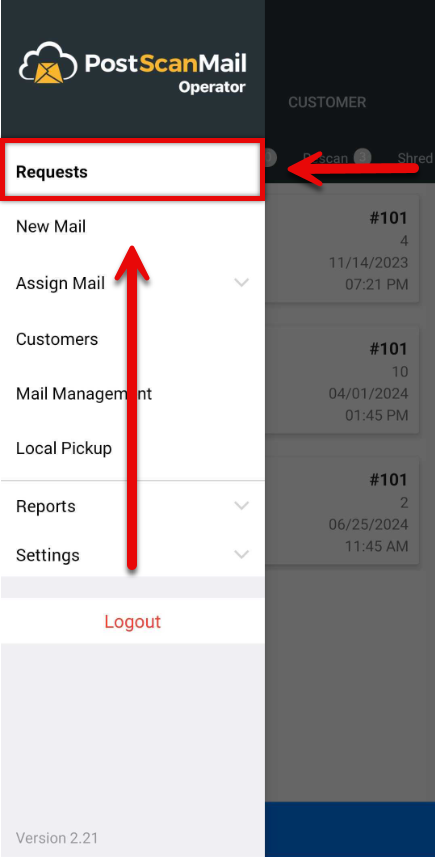
iOS Application
1.) Select the Navigation Menu, highlighted in RED.
2.) Select the Requests button, highlighted in RED.

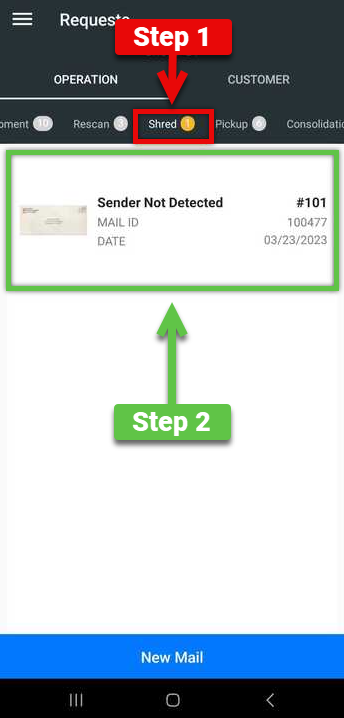
3.) Finding Mobile Customer Requests.

1.) If you can not locate the customer request type you are looking for you can swipe left or right to cycle through all of the request types. This is highlighted in BLUE.
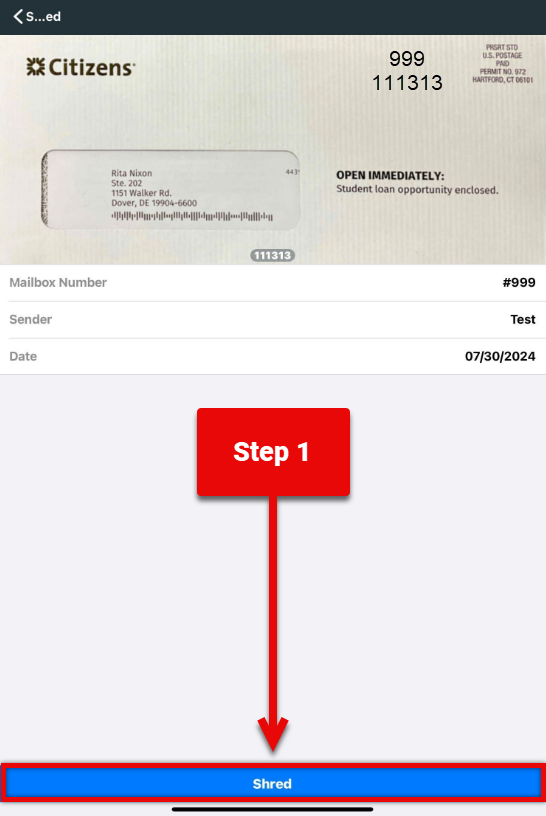
4.) Selecting the mail item.

1.) Select the Shred button highlighted in RED.
2.) Click the mail item that is being shredded, highlighted in YELLOW.
5.) Click the Shred button towards the bottom of the screen, highlighted in RED.
Android Application
1.) Select the Requests button, highlighted in RED.
2.) Finding Mobile Customer Requests.

1.) If you can not locate the customer request type you are looking for you can swipe left or right to cycle through all of the request types. This is highlighted in BLUE.
2.) Selecting the Mail to Shred.
1.) Select the Shred button, highlighted in RED.
2.) Select the Mail Item that needs to the shredded.
3.) Confirmation Screen.

1.) In the box highlighted in RED, is the captured image for the mail item and the Mail ID#.
2.) In the box highlighted in GREEN, is the Mailbox Number (PMB#), Sender, Date the mail was uploaded. The Area ID is an optional feature and can be disregarded.
3.) If all the information looks correct select the Process button, highlighted in YELLOW. This will remove the mail item from the system and it can be shredded.