How do I process an open and scan request?
What Device are you using?

Web Page
1.) Part One - Selecting the mail item to Open & Scan
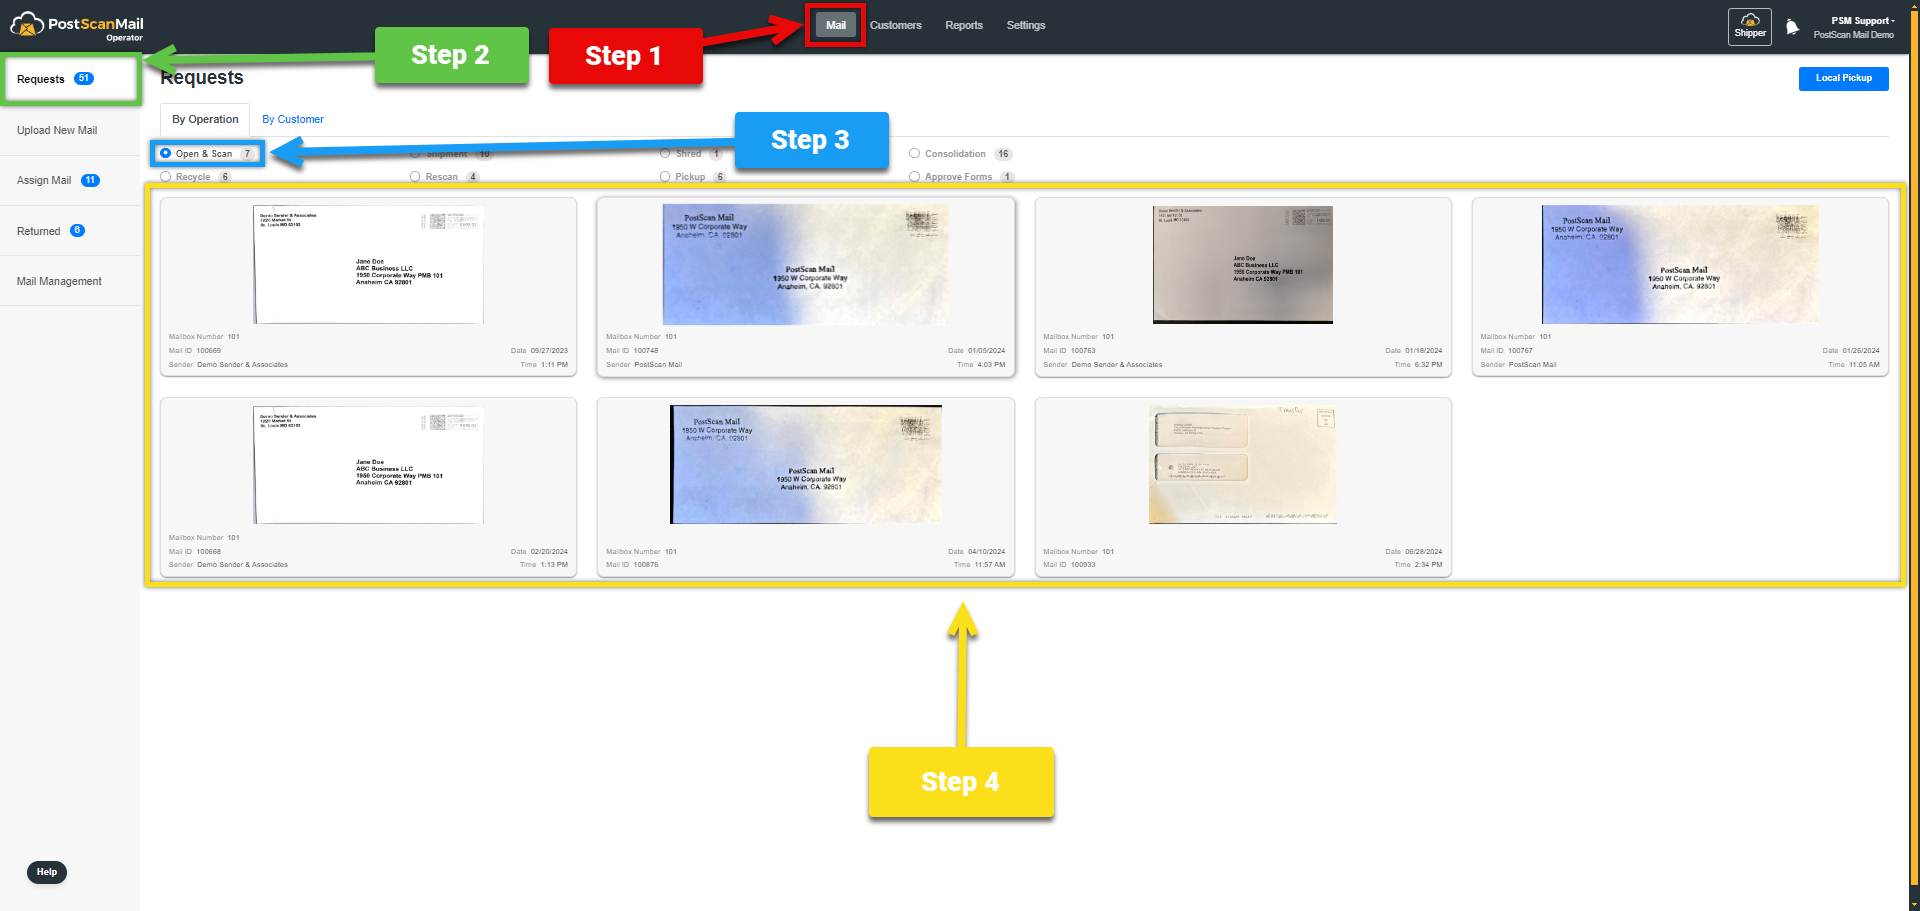
1.) Select the Mail tab at the top of the screen highlighted in RED.
2.) Select the Requests menu to the left of the screen highlighted in GREEN.
3.) Select the Open & Scan request, highlighted in BLUE
4.) Below, highlighted in YELLOW. All of the mail items that the customer has requested to Open & Scan. Select the mail item you are uploading content for.

2.)Part Two - Uploading the contents

1.) All of the information for the Requested mail item will be displayed within the highlighted RED box.
2.) Within the box highlighted in GREEN, is where the Scanned Contents of the mail item can be uploaded.
3.) Select the eyeball icon to bring up the following three icons, highlighted in BLUE.

Delete the scanned & uploaded mail item contents.

View the scanned & uploaded mail item contents in full screen.

Adjust the cropping of the scanned & uploaded mail item contents.
4.) Select the Upload Scan button highlighted in YELLOW once you are finished to upload the contents of the mail item.

iOS Application
Note: For quality assurance purposes we recommend whenever possible that you use a document scanner instead of the mobile device camera. This allows for clearer and printable images, improving customer satisfaction.
1.) Select the Navigation Menu, highlighted in RED
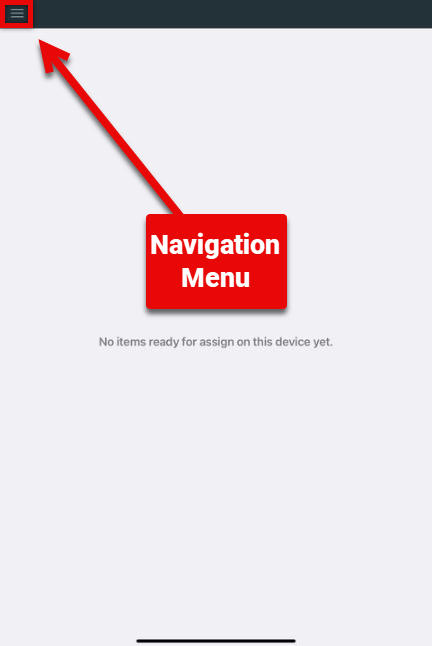
2.) Select the Requests button, highlighted in RED

3.) Part Three - Finding Mobile Customer Requests

1.) If you can not locate the customer request type you are looking for you can swipe left or right to cycle through all of the request types. This is highlighted in BLUE.
4.) Part Four - Selecting the mail item
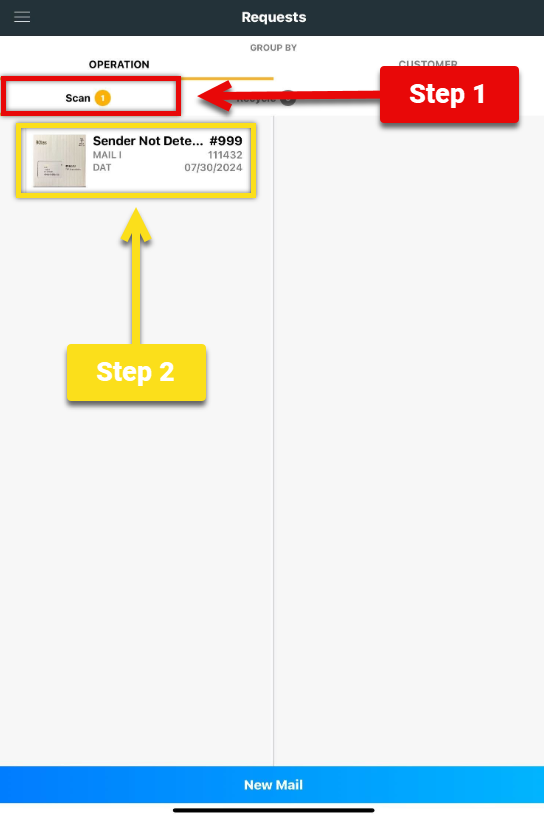
Note: On the iOS App Scan is short for Open & Scan.
1.) Select the Scan button, highlighted in RED.
2.) Select the mail item for which you are trying to upload the contents. This is highlighted in YELLOW.
5.) Part Five - Labeling the mail
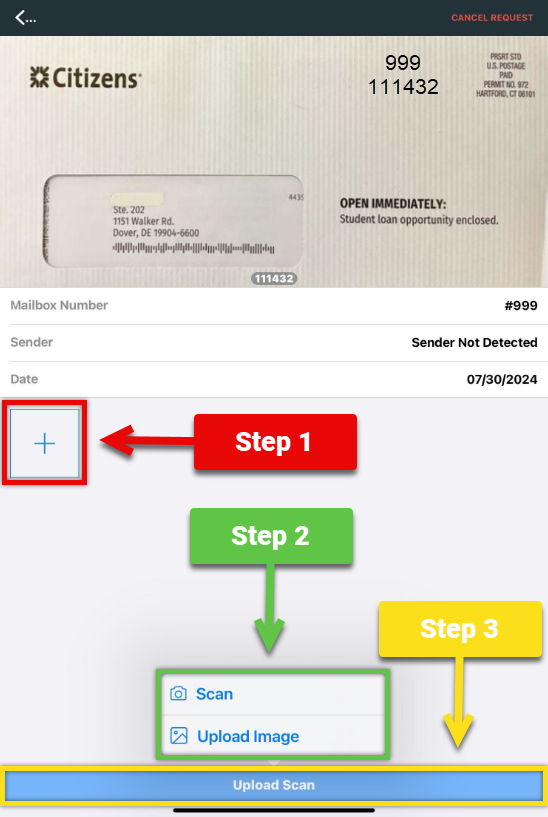
1.) Select the Blue Square with the + symbol, highlighted in RED.
2.) Select Scan button if you are going to take a new picture of the mail item contents. Select the Upload Image if a picture of the contents is already saved to the device. Both of these are highlighted in GREEN.
3.) Select the Upload Scan button highlighted in YELLOW once you are finished to upload the contents of the mail item.
Android Application
Note: For quality assurance purposes we recommend whenever possible that you use a document scanner instead of the mobile device camera. This allows for clearer and printable images, improving customer satisfaction.
Part One - Selecting the Mail Item to Open & Scan

Note: On the Android App Scan is short for Open & Scan.
1.) Select the Scan button, highlighted in RED.
2.) Within the box highlighted in YELLOW, all of the mail items that have an Open & Scan request are listed. Select the mail item you are open & scanning for.
Part Two - Scanning and Uploading the Mail Contents
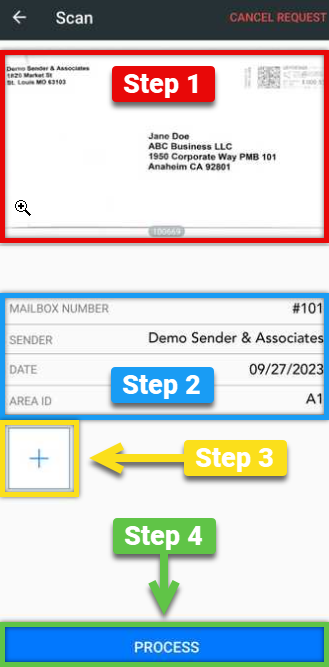
1.) In the box highlighted in RED, the image for the Mail Item and the Mail ID# are displayed.
2.) In the box highlighted in BLUE, the Mailbox Number (PMB#), Sender, Date the mail was uploaded, and Area ID. Area ID can be disregarded.
3.) Click on the Blue + to begin uploading the Mail Item Contents. This is highlighted in YELLOW.
4.) When all of the Mail Item Contents are uploaded. Select the Process button, highlighted in GREEN.