How do I add recipients to an Account? (Web Page Only)

Web Page Only
Note: Adding recipients can NOT be done through iOS or the Android app. It can only be done through the Web Browser.
1.) Step One
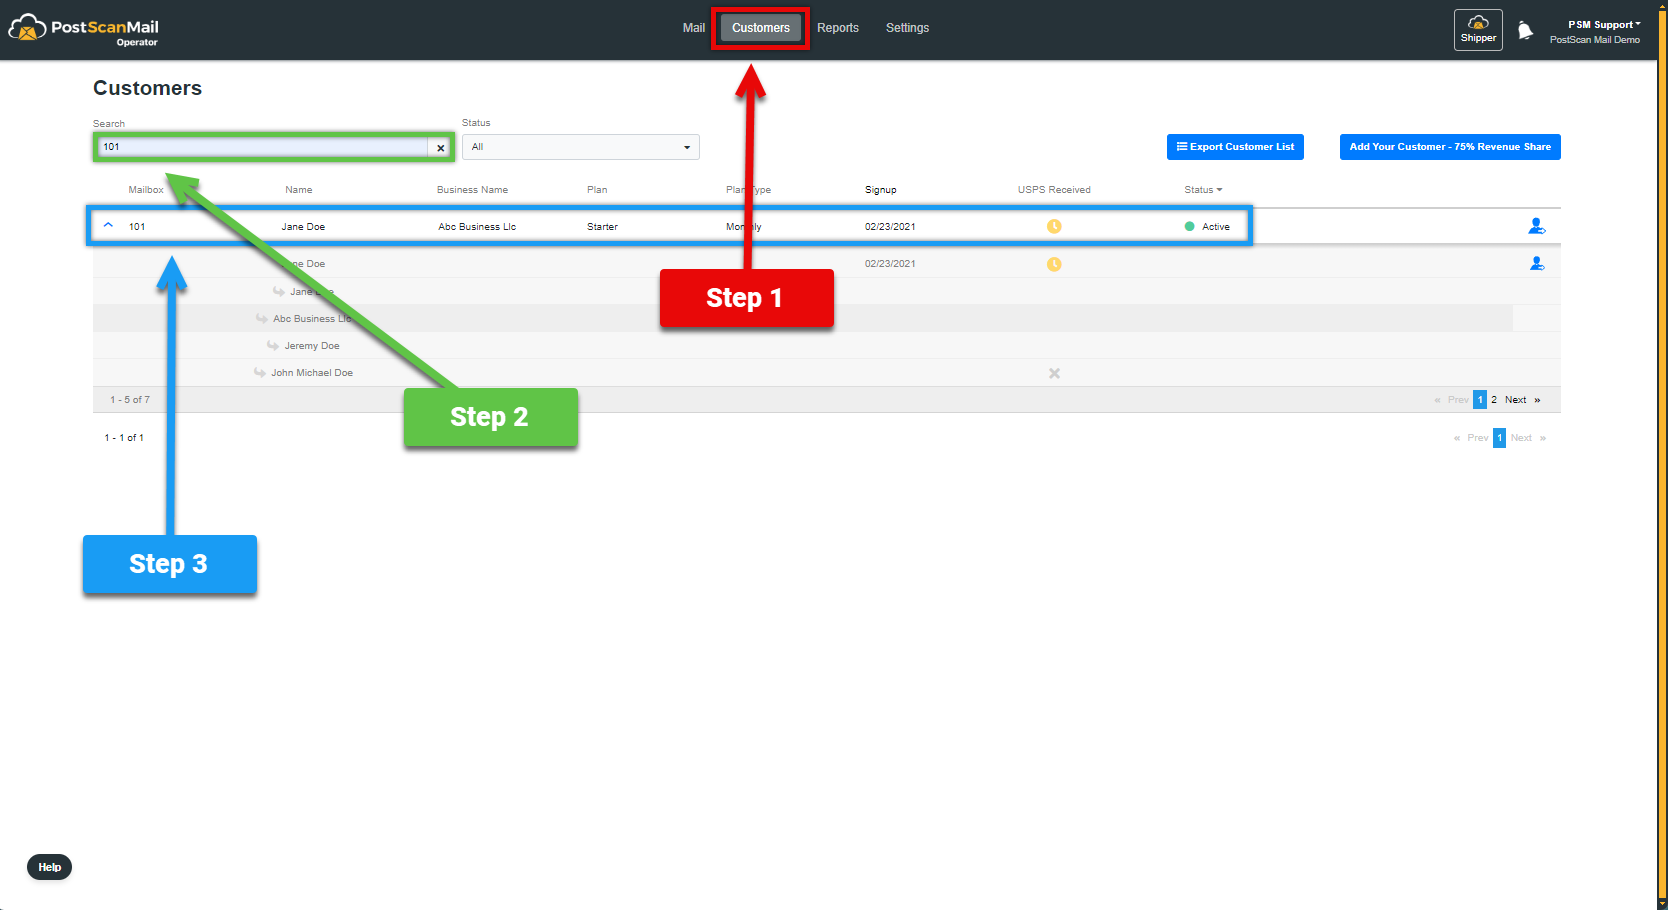
1.) Select the Customers tab at the top right of the screen, highlighted in RED.
2.) Enter the customers PMB# into the Search field, highlighted in GREEN.
3.) Click on the Customer tab, highlighted in BLUE.

2.) Step Two.

1.) Select the Users tab, highlighted in RED.
2.) Select the Customer highlighted in GREEN.

3.) Select the Add Recipient button, highlighted in RED.

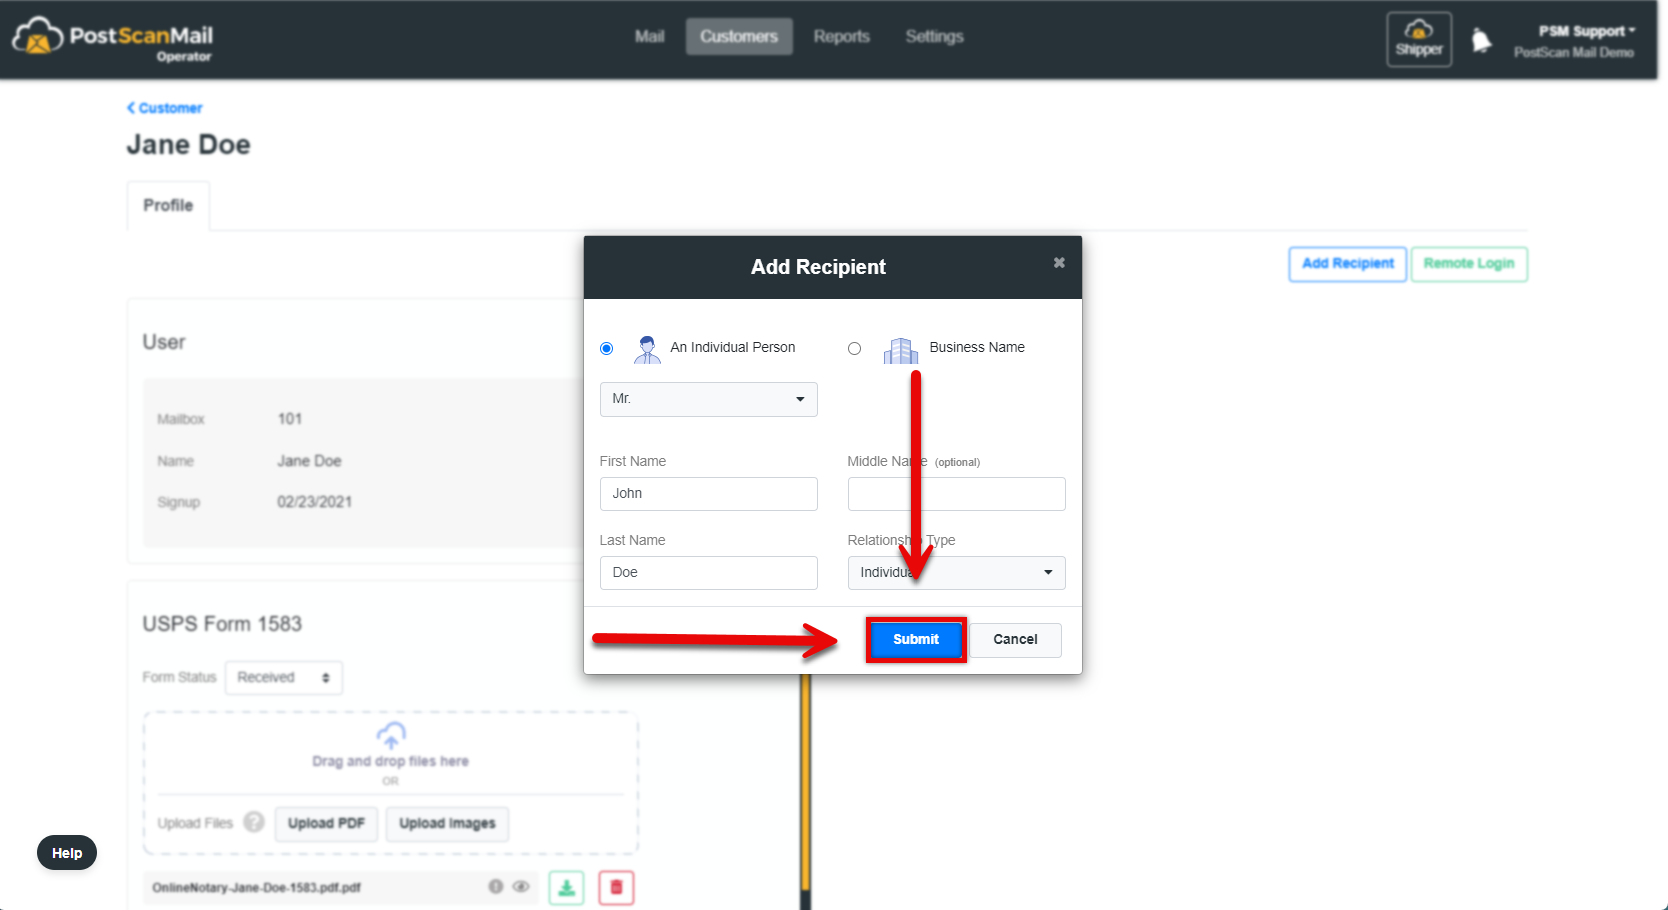
4.) Step Four

1.) Choose between adding an individual person or a Business, highlighted in RED.
2.) If you are adding an Individual person a First Name and Last Name are required, these text boxes are highlighted in BLUE. If it is for a Business, only need the Business Name.
3.) If you are adding an Individual select the Relationship Type to the customer. This selection menu is highlighted in GREEN.

5.) When all the information is correctly entered, select the Submit button to add the new recipient.